Finding a crowd-pleasing appetizer that’s both gluten-free and packed with flavor can feel like an uphill battle. Whether you’re hosting game day, planning a party, or just craving something spicy and cheesy for a weekend snack, it’s tough to find recipes that work for everyone at the table without sacrificing taste.
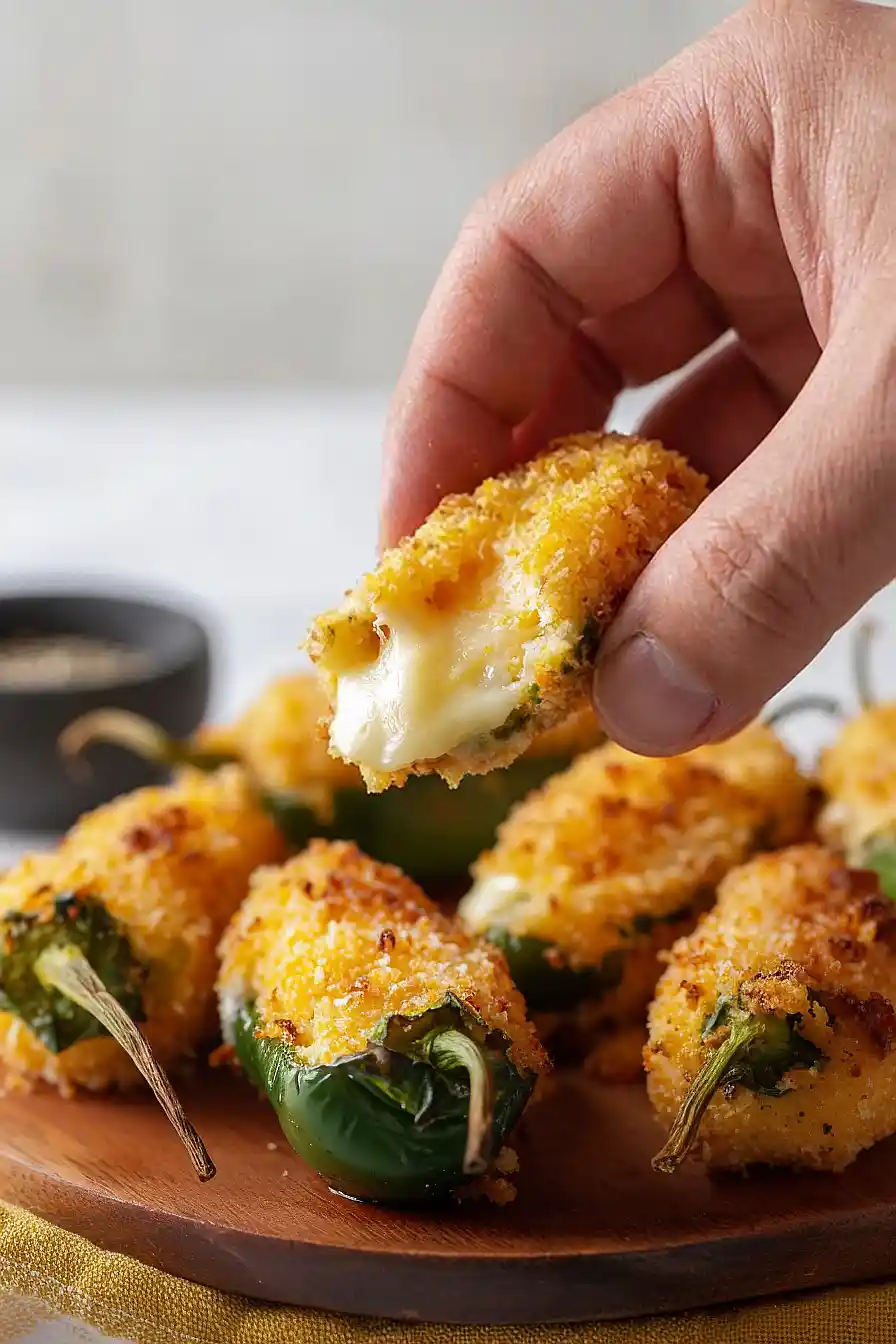
Thankfully, these gluten-free jalapeño poppers solve that problem perfectly: they’re crispy on the outside, creamy on the inside, easy enough to make on a weeknight, and nobody will even notice they’re gluten-free.

Why You’ll Love These Jalapeño Poppers
- Naturally gluten-free – Using gluten-free panko crumbs means everyone can enjoy these crispy, cheesy bites without worry.
- Perfect party appetizer – These poppers disappear fast at gatherings and game days, and they’re way better than anything you’d get from a restaurant.
- Quick and easy – Ready in under an hour, this recipe is simple enough for beginners but impressive enough for any occasion.
- Customizable heat level – You can control the spice by removing more or less of the jalapeño seeds and membranes, making them mild enough for kids or keeping them fiery for heat lovers.
- Crispy, cheesy goodness – The combination of creamy cheese filling and crunchy topping creates the perfect texture contrast in every bite.
What Kind of Jalapeño Peppers Should I Use?
Fresh jalapeños are what you’ll want for this recipe, and you can find them in just about any grocery store year-round. When picking them out, look for firm peppers with smooth, shiny skin and no soft spots or wrinkles. The size of your jalapeños will determine how many poppers you end up with, so if you can, try to choose peppers that are roughly the same size so they cook evenly. Keep in mind that jalapeños can vary quite a bit in heat level – even peppers from the same batch can surprise you – so if you’re sensitive to spice, you’ll definitely want to remove all the seeds and white membranes inside, which is where most of the heat lives.

Options for Substitutions
This recipe is pretty straightforward, but here are some swaps you can make if needed:
- Jalapeño peppers: If you want less heat, try mini sweet peppers instead. They have the same shape but are much milder. You can also use poblano peppers cut into strips for a different presentation.
- Cream cheese: Make sure to use full-fat cream cheese here – it’s really important for the right texture and flavor. Light versions tend to get watery and won’t hold up as well when baked.
- Sharp cheddar cheese: Feel free to swap this with monterey jack, pepper jack (for extra spice), or even gouda. Just stick with something that melts well.
- Gluten-free panko bread crumbs: If you’re not gluten-free, regular panko works perfectly. You can also use crushed gluten-free crackers or cornflake crumbs for a different crunch.
- Spices: Don’t have all the spices on hand? You can simplify and just use garlic powder and salt. The poppers will still taste great without the chili powder, paprika, and pepper.
Watch Out for These Mistakes While Baking
The biggest mistake when making jalapeño poppers is not wearing gloves while handling the peppers – the oils can burn your skin and eyes for hours afterward, so protect your hands or wash them thoroughly with soap and oil (not just water) after prepping.
Another common error is leaving too much of the white membrane inside the peppers, which is actually where most of the heat comes from, so scrape it out completely if you want milder poppers or leave some in if you like extra spice.
To prevent your cheese filling from bubbling out during baking, don’t overfill the peppers – leave a little room at the top and make sure the cream cheese is at room temperature so it mixes smoothly with the cheddar.
For crispier bread crumb topping, lightly spray the assembled poppers with cooking oil before baking, and if they start browning too quickly, tent them loosely with foil for the last few minutes.
What to Serve With Jalapeño Poppers?
Jalapeño poppers are perfect party food, so I like serving them alongside other finger foods like buffalo wings, mozzarella sticks, or a big platter of nachos. They’re also great as an appetizer before grilling out – think burgers, hot dogs, or barbecue chicken. Don’t forget the dipping sauces! Ranch dressing and sour cream are classics that help cool down the heat, but I also love serving them with a tangy barbecue sauce or even a sweet chili sauce for dipping. If you want to round out the spread, add some celery and carrot sticks with more ranch on the side, or a simple tortilla chip and salsa situation.
Storage Instructions
Store: Leftover jalapeño poppers keep well in an airtight container in the fridge for up to 3 days. They’re great for snacking on throughout the week, though they’re definitely best enjoyed fresh from the oven when the cheese is all melty and gooey.
Freeze: You can freeze these before or after baking. For unbaked poppers, arrange them on a baking sheet and freeze until solid, then transfer to a freezer bag for up to 2 months. If you’re freezing already baked ones, let them cool completely first and store the same way.
Reheat: Pop refrigerated poppers back in a 350°F oven for about 10 minutes until warmed through and crispy again. If baking from frozen, add an extra 5-10 minutes to the original baking time. The microwave works in a pinch, but the oven keeps them way crispier.
| Preparation Time | 20-30 minutes |
| Cooking Time | 20-25 minutes |
| Total Time | 40-55 minutes |
| Level of Difficulty | Medium |
| Servings | 30 pieces |
Estimated Nutrition
Estimated nutrition for the whole recipe (without optional ingredients):
- Calories: 1450-1600
- Protein: 35-42 g
- Fat: 110-125 g
- Carbohydrates: 70-80 g
Ingredients
For the peppers:
- 15 jalapeño peppers (cut in half lengthwise and seeded)
For the filling:
- 8 oz cream cheese (at room temperature for a smoother texture)
- 6.5 oz sharp cheddar cheese, shredded
- 1 tablespoon fresh chives, finely chopped
For the topping:
- 3/4 cup gluten-free panko bread crumbs
- 1/2 teaspoon garlic powder
- 1/4 teaspoon salt
- 1/4 teaspoon chili powder
- 1/4 teaspoon smoked paprika
- 1/4 teaspoon black pepper
- 1/8 teaspoon ground cumin
Step 1: Prepare the Oven and Mise en Place
- Baking sheet lined with parchment paper
Preheat your oven to 375°F and line a baking sheet with parchment paper or foil for easy cleanup.
While the oven heats, prepare all your ingredients by measuring out the spices, shredding the cheddar cheese if not already done, and finely chopping the fresh chives.
Having everything ready before you start will make the assembly process quick and smooth.
Step 2: Prepare the Jalapeño Peppers
- 15 jalapeño peppers
If not already done, slice all 15 jalapeño peppers lengthwise down the middle, being careful to keep the stem end intact for structural integrity.
Using a small spoon or knife tip, gently remove all the seeds and white pith from each half—this step is crucial for reducing heat and preventing the filling from sliding out during baking.
Pat the pepper halves dry with a paper towel to help the cheese mixture adhere better.
Step 3: Make the Cheese Filling
- 8 oz cream cheese
- 6.5 oz sharp cheddar cheese, shredded
- 1 tablespoon fresh chives, finely chopped
In a medium bowl, combine the room-temperature cream cheese and shredded cheddar cheese, mixing until smooth and fully integrated with no lumps.
Fold in the finely chopped fresh chives, which will distribute the mild onion flavor throughout the filling.
I like to use a spatula and work the mixture gently until it’s creamy and spreadable—this usually takes just a minute or two.
Step 4: Create the Seasoned Bread Crumb Coating
- 3/4 cup gluten-free panko bread crumbs
- 1/2 teaspoon garlic powder
- 1/4 teaspoon salt
- 1/4 teaspoon chili powder
- 1/4 teaspoon smoked paprika
- 1/4 teaspoon black pepper
- 1/8 teaspoon ground cumin
In a shallow dish, combine the gluten-free panko bread crumbs with the garlic powder, salt, chili powder, smoked paprika, black pepper, and ground cumin.
Mix thoroughly with a fork or your fingers to distribute the spices evenly throughout the bread crumbs.
This creates a flavorful, aromatic coating that will crisp up beautifully in the oven.
Step 5: Fill and Coat the Peppers
- cheese filling from Step 3
- seasoned bread crumb mixture from Step 4
Using a small spoon or piping bag, generously fill each jalapeño half with the cheese mixture from Step 3, mounding it slightly on top.
Press the cheese side of each filled pepper directly into the seasoned bread crumb mixture from Step 4, coating evenly.
Place each coated pepper cut-side up on the prepared baking sheet, then sprinkle a little extra bread crumb mixture on top of each one for added crunch and visual appeal.
Step 6: Bake Until Golden and Bubbly
Place the baking sheet in the preheated 375°F oven and bake for 18-20 minutes, until the bread crumb coating is golden brown and the cheese is melted and starting to bubble around the edges.
For perfectly even baking, I rotate the pan halfway through if your oven tends to have hot spots.
The peppers should be tender but still hold their shape.
Step 7: Cool Slightly and Serve
Remove the poppers from the oven and let them rest on the baking sheet for 2-3 minutes before serving.
This brief cooling allows the cheese to set slightly so it won’t be mouth-scorching when you bite into them.
Transfer to a serving platter and enjoy while they’re still warm with the cheese creamy and the coating crispy.
Baked Gluten Free Jalapeño Poppers
Ingredients
Method
- Preheat your oven to 375°F and line a baking sheet with parchment paper or foil for easy cleanup. While the oven heats, prepare all your ingredients by measuring out the spices, shredding the cheddar cheese if not already done, and finely chopping the fresh chives. Having everything ready before you start will make the assembly process quick and smooth.
- If not already done, slice all 15 jalapeño peppers lengthwise down the middle, being careful to keep the stem end intact for structural integrity. Using a small spoon or knife tip, gently remove all the seeds and white pith from each half—this step is crucial for reducing heat and preventing the filling from sliding out during baking. Pat the pepper halves dry with a paper towel to help the cheese mixture adhere better.
- In a medium bowl, combine the room-temperature cream cheese and shredded cheddar cheese, mixing until smooth and fully integrated with no lumps. Fold in the finely chopped fresh chives, which will distribute the mild onion flavor throughout the filling. I like to use a spatula and work the mixture gently until it's creamy and spreadable—this usually takes just a minute or two.
- In a shallow dish, combine the gluten-free panko bread crumbs with the garlic powder, salt, chili powder, smoked paprika, black pepper, and ground cumin. Mix thoroughly with a fork or your fingers to distribute the spices evenly throughout the bread crumbs. This creates a flavorful, aromatic coating that will crisp up beautifully in the oven.
- Using a small spoon or piping bag, generously fill each jalapeño half with the cheese mixture from Step 3, mounding it slightly on top. Press the cheese side of each filled pepper directly into the seasoned bread crumb mixture from Step 4, coating evenly. Place each coated pepper cut-side up on the prepared baking sheet, then sprinkle a little extra bread crumb mixture on top of each one for added crunch and visual appeal.
- Place the baking sheet in the preheated 375°F oven and bake for 18-20 minutes, until the bread crumb coating is golden brown and the cheese is melted and starting to bubble around the edges. For perfectly even baking, I rotate the pan halfway through if your oven tends to have hot spots. The peppers should be tender but still hold their shape.
- Remove the poppers from the oven and let them rest on the baking sheet for 2-3 minutes before serving. This brief cooling allows the cheese to set slightly so it won't be mouth-scorching when you bite into them. Transfer to a serving platter and enjoy while they're still warm with the cheese creamy and the coating crispy.